Friday, September 25, 2015

Wolf's Ridge Brewing

We've wanted to visit Wolf's Ridge for their Sunday brunch but haven't done that yet.  We were able to catch them at the North Market Craft Brew Fest, where we tried the amazing Dire Wolf Canis Mexicanus. This is an 10.3 % ABV, 70 IBU, Imperial Stout aged on vanilla bean, cocoa nibs, cinnamon, chilis, and One Line espresso.  The depth of flavor was amazing and the chilis left just a little warmth in the back of your throat.
North Market Ohio Craft Brew Fest - 9/11 and 9/12


Our tasting experience made making a visit to the brewery a new priority.  We stopped in on a quiet Thursday afternoon and had a fantastic lunch and tasted 11 beers including their Oktoberfest freshly on tap.  Their descriptions are spot on in matching the signature of each beer.  I included my snap shot of their beer list because I couldn't find one online. Highlights included "Watchtower" an awesome ESB on Nitro.  What a smooth finish.  My wife and I both agreed on "Ploughshare".  Just enough citrus and a great touch of Rye.  I found their Wit and Cream Ale really good and true to style.  The "Earthrise" IPA has pineapple in it and I can't remember ever having that in a beer.  A very distinctive flavor but not over done.  This is one of those places where all the beers are good. It's just a question of figuring out what you like best.  Wolf's Ridge rocketed to close to the top of our favorite breweries after this trip.


Operation Fischfang (German counter-attack on Anzio beachead) February 16-20, 1944

Massive Micro Armor battle on a Wednesday night as eight players gathered at Mark's for a MicroMAG WWII blow out. The troops were already laid out.  All we needed was a fistful of d10s and we were off.  

We played a portion of the historical Operation Fischfang, one of the German counter-attacks on the Anzio beachead, February 16-20, 1944.  The specific operational area was around the Aprilla (Factory) down the Bowling Alley and towards the Padiglione Woods which fit easily on our 4'x8' hex mat.  In this area the British and US zones met, and the Germans attacked hoping to split the Allies. down the road towards Anzio.  For the Allies, there's no place to run to as the beachhead was only about 4 miles deep at the time.  

There were 10 logical command groups, and roughly 40 aircraft between the three Corps commands. We split these among two U.S., one British, and five German players. We started moving pieces at 7pm and timed our turn limits to be about 20 minutes so we would be done around 10:30pm.  Each commander controlled aircraft, reinforcements and Corps-level artillery. Every command had tanks and infantry/paratroopers/engineers.  Historically there were Tigers, Panthers, Ferdinands, Nashorn, Nebelwerfer, Brumbar, Railroad guns and Stukas on the German side, plus some historical wrinkles. Allies had artillery, more artillery and naval gunfire support (artillery), with plenty of Sherman, Churchill, Valentines and Firefly tanks…and maybe some more artillery.  Also the A-36 Mustang ground attack version of P-51 with dive brakes was present in numbers!   About 8 pounds of micro armor were on the board.  Massive levels of destruction were anticipated.

The corridor between the Allied commands.
Set up begins.  "Have a plate of micro armor".
Dawn came to Aprilla only to see a large group of  Fallschirmjägers emerging from the mist.  Two German command groups can be seen churning up the fields as they come in east of the town and also begin to head for the vineyard.

View from the allied lines from behind Aprilla.  Americans hold the town.
British armor advancing on the left.
Fighting for Aprilla.
M10's try to hit the advancing German flank as a massive air combat begins.  Too few allied planes made it through the German defenses to stop anything on the ground.  Kesselring had thrown all he had into the Italian skys, stripping other areas to achieve air superiority at Anzio.         


The Allies put up a good front, but it was disturbing to see all the empty space to the beachhead.


At about 10:30pm this is where we called it.  Germans began to penetrate the center with only the possibility of a slow but steady British advance eastward interfering with them keeping open a corridor to the beach,


REPLAY - "Rearguard at Schärding" - (River Inn, near Linz) April 26, 1809, Corps In Conflict, 3mm Pico Armor Napoleonics

The weekend after Labor Day we had a chance to replay the napoleonic scenario, "Rearguard at Schärding".  Once again my French vs. Mark's Austrians.  Below is the scenario briefing.

On April 10, 1809 Archduke Charles’ surprise invasion of the Kingdom of Bavaria put the Grande Armée of Emperor Napoleon I of France at a disadvantage. On April 19th, Charles failed to take advantage of his opportunities and Napoleon struck back with savage force against the Austrian left wing under FM Hiller. After battles on April 20/21 FM Hiller's troops were driven into a headlong retreat to the southeast.  Having temporarily disposed of FM Hiller, Napoleon turned north with his main army against Archduke Charles. On April 22/23, the Franco-Germans defeated Charles' army and forced it to withdraw to the north bank of the Danube. Meanwhile, Napoleon sent MdE Bessières to pursue the Austrian left wing with minor forces. Not knowing that Archduke Charles had been defeated, FM Hiller turned back upon his pursuer, defeating MdE Bessières near Neumarkt-Sankt Veit. Once he found that he was alone on the south bank facing Napoleon's main army, FM Hiller retreated rapidly to the east in the direction of Vienna.

On April 24th Charles sent a message to FM Hiller ordering him to retreat to Linz, cross to the Danube's north bank, and join the main army.  Hoping to overtake and destroy FM Hiller, Napoleon sent two new columns of Marshal Davout's III Corps and Marshal Masséna's IV Corps towards the Inn River in pursuit of his foe. On April 26th, GD Legrand of Masséna's IV Corps caught FM Hiller's rear guard of FML Kottulinsky still west of Schärding.

For the replay the Austrians stuck pretty much to the same defensive line well in front of the river, The French decided to employ slightly different tactics.  I limbered all my artillery and moved it directly to the front with my assault columns. I split my heavy cavalry division into two brigades and sent one to each flank.  The objective was still the Austrian right center.  I was hoping to stretch his defenses and punch a hole through to the river crossing.

French advance toward their objectives.
French cavalry tie up the Austrian flanks as French infantry assault the woods and center.  Austrian artillery in the town ans woods would prove devastating to the French attacks.  The first units in were hurled back, and the attack needed to regroup.   

French infantry attempt to force the Austrian left from the wood,  Austrian artillery a factor here.
A true combined arms attack as all French arms get into the action.  This and close command support are keys to big attacks.

The French finally penetrate the Austrian center,  It remained to be seen whether French cavalry could prevent the Austrians from an orderly withdraw, but slight tactical changes made a big difference in this game,  


Sunday, September 6, 2015

"Rearguard at Schärding" - (River Inn, near Linz) April 26, 1809, Corps In Conflict, 3mm Pico Armor Napoleonics

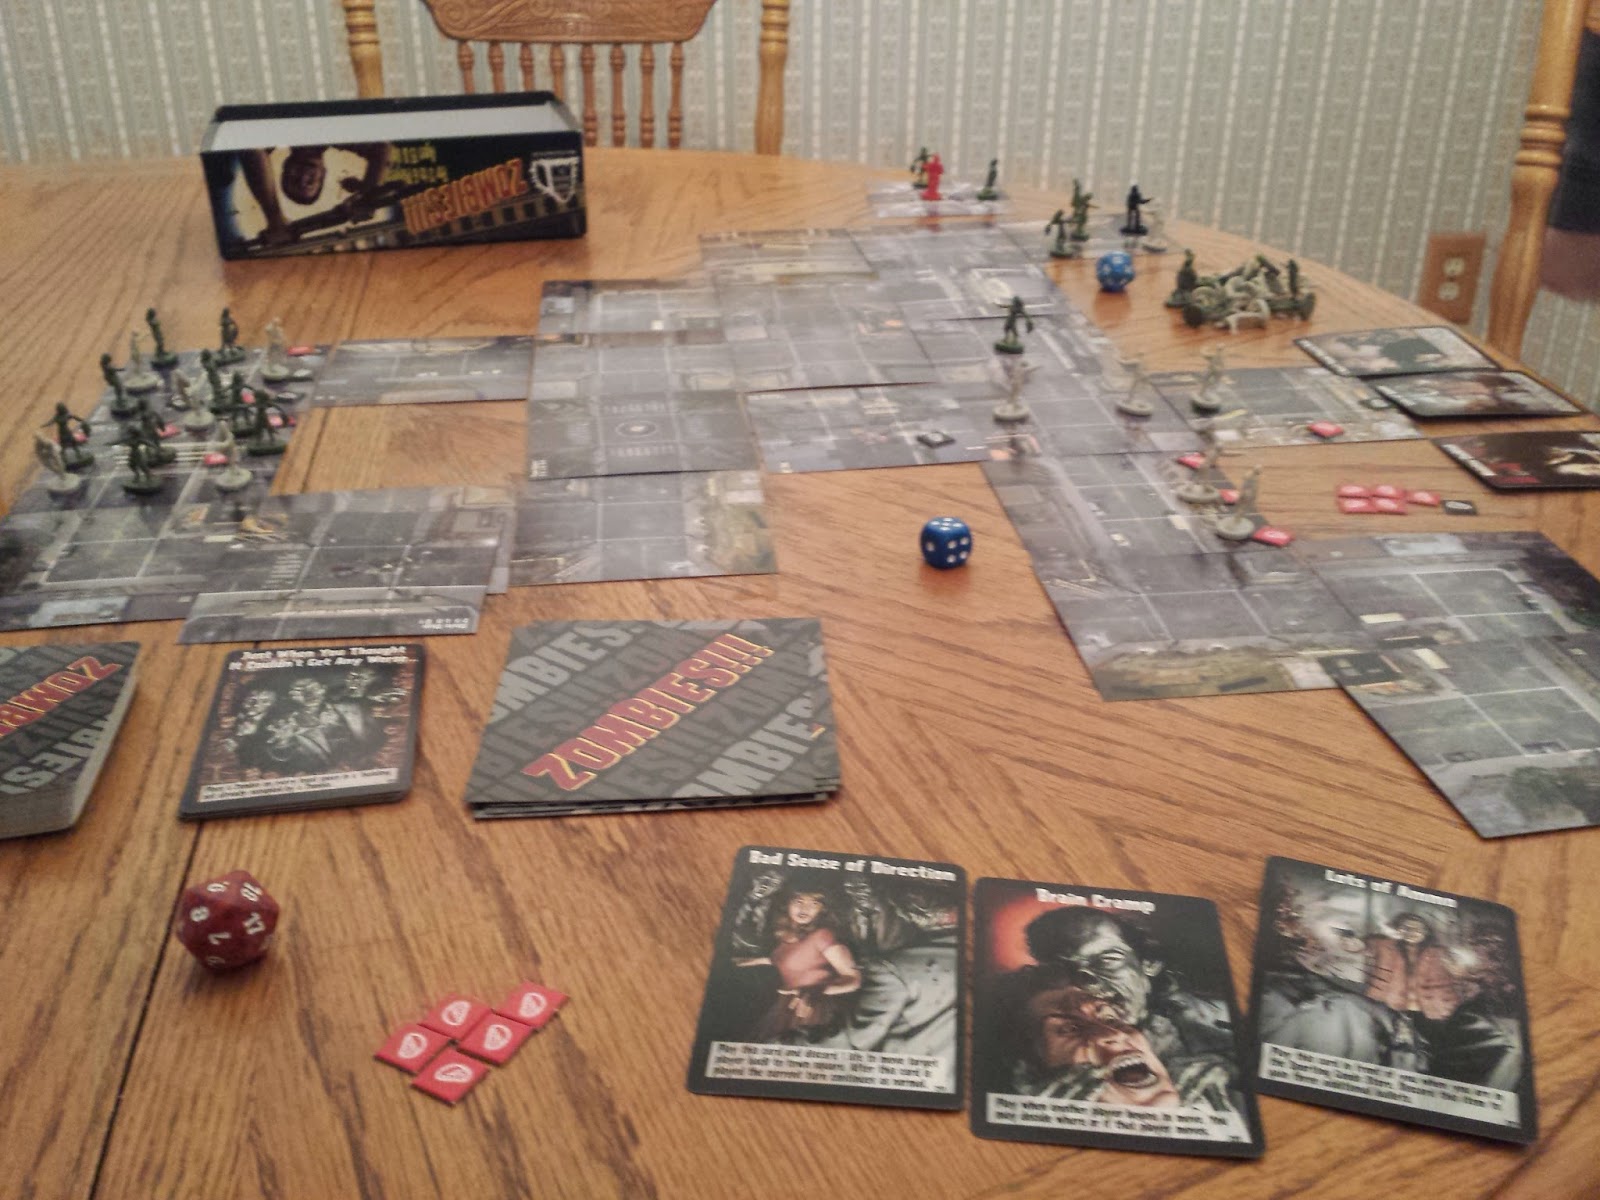
We used the Labor Day weekend to play a new napoleonic scenario, "Rearguard at Schärding".  My French were once again pitted against their old adversary, Mark's Austrians.  Below is the scenario briefing.

On April 10, 1809 Archduke Charles’ surprise invasion of the Kingdom of Bavaria put the Grande Armée of Emperor Napoleon I of France at a disadvantage. On April 19th, Charles failed to take advantage of his opportunities and Napoleon struck back with savage force against the Austrian left wing under FM Hiller. After battles on April 20/21 FM Hiller's troops were driven into a headlong retreat to the southeast.  Having temporarily disposed of FM Hiller, Napoleon turned north with his main army against Archduke Charles. On April 22/23, the Franco-Germans defeated Charles' army and forced it to withdraw to the north bank of the Danube. Meanwhile, Napoleon sent MdE Bessières to pursue the Austrian left wing with minor forces. Not knowing that Archduke Charles had been defeated, FM Hiller turned back upon his pursuer, defeating MdE Bessières near Neumarkt-Sankt Veit. Once he found that he was alone on the south bank facing Napoleon's main army, FM Hiller retreated rapidly to the east in the direction of Vienna.

On April 24th Charles sent a message to FM Hiller ordering him to retreat to Linz, cross to the Danube's north bank, and join the main army.  Hoping to overtake and destroy FM Hiller, Napoleon sent two new columns of Marshal Davout's III Corps and Marshal Masséna's IV Corps towards the Inn River in pursuit of his foe. On April 26th, GD Legrand of Masséna's IV Corps caught FM Hiller's rear guard of FML Kottulinsky still west of Schärding.

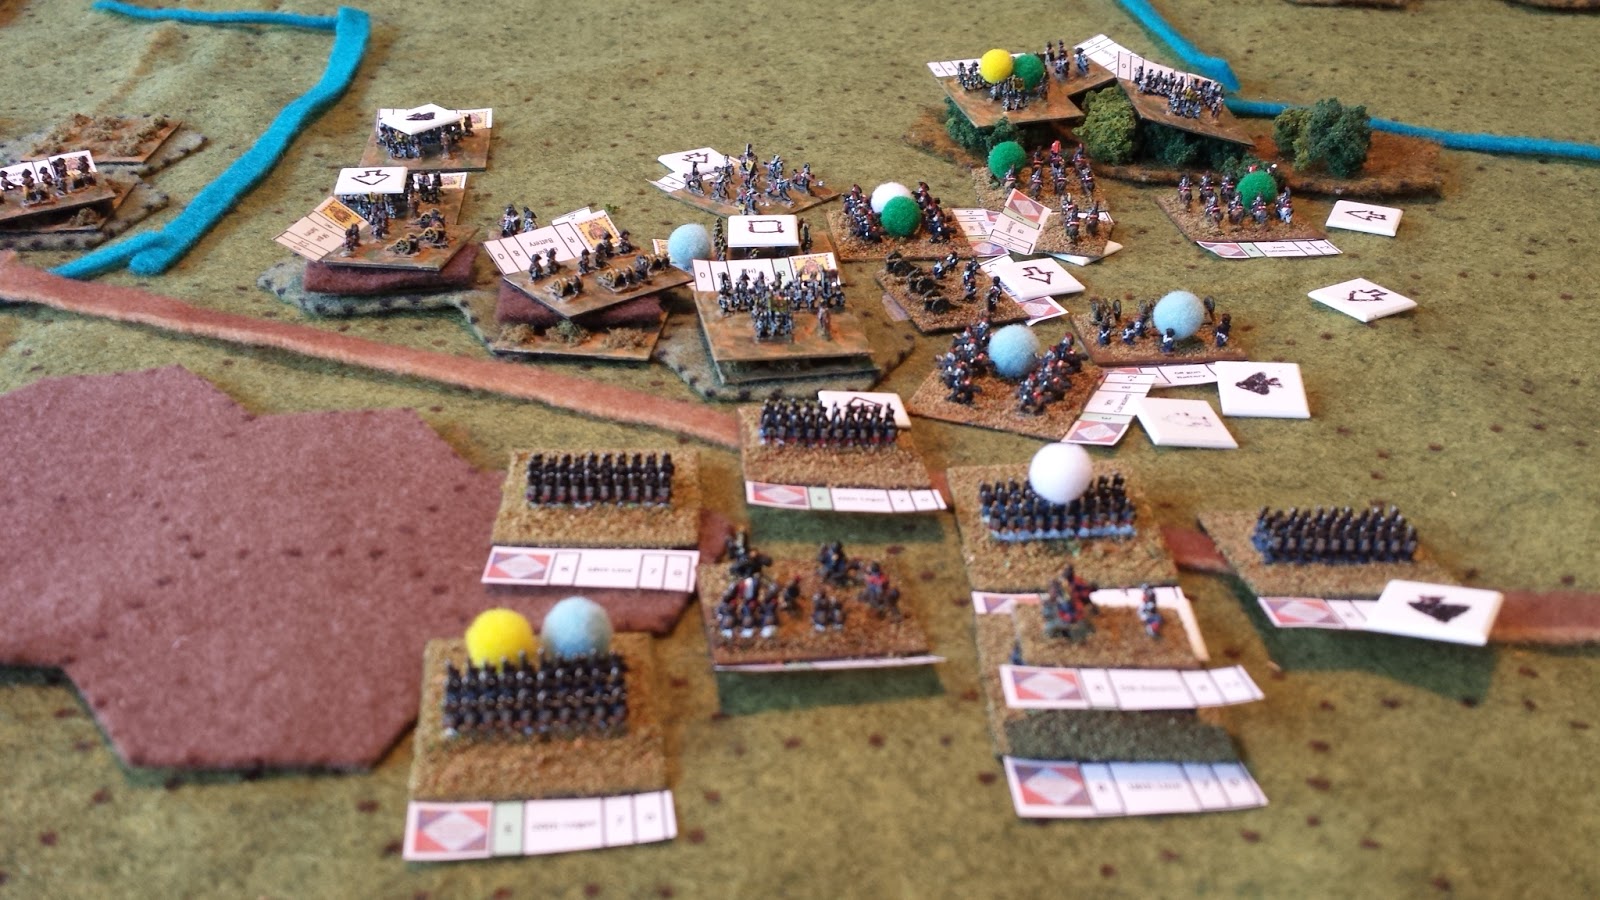
Here's a look at the map.  The River Inn flows behind Scharding in the background.

The Map - The River Inn flows behind Scharding in the background.

This scenario was the first time we've had any significant amount of heavy cavalry in a battle. Nansouty’s Cavalry Division got me back to the workbench to get them ready for this fight. We're continuing to get the feel of these rules. They definitely have a more strategic feel and I have to remind myself not to think too tactically. Time, distance, and combined arms are critical factors you have to incorporate into your planning.

The Austrian battle line forms well in front of the river crossing.


The Austrian Center
The French come onto the field.

The French come onto the field.

The French strategy was to pin the flanks and send in the heavy cavalry division as quickly as possible against the Austrian right center which was made up of a line of infantry in the open. The goal was to punch through there and race for the river crossing.
The French 1st and 2nd Carabiniers wait to advance.
I spent a few mores turns than normal advancing the French infantry and artillery to support the cavalry attack. These rules force opponents to take a morale check when fired on by artillery so you have to make the decision of whether to take more time to deploy or get artillery forward fast.  Firing early and more often may inflict morale damage and break a unit as opposed to moving in fast and getting in close range to cause damage. I think future actions will see me moving my #6 batteries in closer to the point of attack.


The 1st and 2nd Carabiniers went in on around turn 4-5.  The brigade attack was broken up by some lousy morale checks before it hit home.  The Austrian artillery on the French right did heavy damage but three battalions of French advanced undamaged.  It seems like the first unit to make contact really gets chewed up but that allows the rest of the attack to keep going.

French guns in action
The French heavy cavalry was unable to break the Austrian squares but they would eventually grind them down.  One key thing I learned was to advance artillery to pound the squares and achieve the breakthrough faster.

We played 11 turns and the French finally penetrated the Austrian center on the last turn.  The Austrian left was under pressure but they still maintained a central reserve and had plenty of defensible positions before they reached the river.

French pushing the Austrian Center
The Austrian artillery in this game was powerful.  Their canister was devastating. French losses when we suspended hostilities were 4 infantry and 1 cavalry unit.  The Austrians had lost 2 infantry units and had lots of stuff bleeding.

The Austrians rolled good morale all day and the French seemed to have trouble making the most of good attacks and keeping morale up. When we called it a day it looked like the French would get through the Austrian center but whether they could make a dash for the river crossing or not was still unclear.

All in all a great game.  We'll try it again soon as we continue to refine our tactics.  Thanks to Mark for hosting and a great looking table.

Order of Battle "Rearguard at Schärding" - (River Inn, near Linz) April 26, 1809

Austrian IV Corps  

FML Kottulinsky  
Ob Csollich  
12# Battery (6 guns)  
6# Battery (6 guns)    

GM Weissenwolf  
4th Line  
49th Line  
6# Battery (8 guns)  

GM Hohenfeld    
14th Line    
59th Line (Hungarian)  
6# Battery (8 guns)

GM Nordmann  
St George Grenz  
3# Battery (8 guns)    
6th Chevau-Leger  
7th Hussar    
6# Horse Battery (6 guns)    

French IV Corps   

GD Legrand    
12# Battery (6 guns)

GB Essarts    
26th Leger    
18th Line    
6# Battery (6 guns)  

Nansouty’s Cavalry Division
GB Doumerc    
2nd Cuirassiers
9th Cuirassiers  

GB Defrance  
1st Carabiners  
2nd Carabiners    

Baden Contingent
Ob Neuenstein    
Jäger Battalion  
1st Guards    

Crown Prince Charles  
2nd Line  
3rd Line  
6# Battery (6 guns)  

Sunday, August 23, 2015

3mm Pico Armor French Heavy Cavalry Division

Putting the finishing touches on my French Heavy Cavalry Division, then on to the British Light Division for the Peninsula.

One Step closer.  Darn, forgot to paint Nansouty.  I'll have to start that tomorrow.


Heavy Cavalry Division - Cuirassiers and Carabiniers
The General takes the field

Saturday, August 22, 2015

"Battle of the Bogey Inn" - Corps In Conflict, 3mm Pico Armor Napoleonics, Crisis at Aderklaa (Wagram) July 6, 1809

Sand volleyball tournaments gave us a chance to meet at the Bogey Inn and use the back patio to shake the bugs out of the Corps In Conflict rules.  Weapons of choice were 3mm Pico Armor Napoleonics. We played the scenario - Crisis at Aderklaa (Wagram) July 6, 1809, which features the action around the French left at Wagram between the Austrian 1st Corps and elements of Massena’s Corps.

The game begins with the Austrians holding the heights around the village of Aderklaa and the French receiving direct orders from the Emperor to take it.


We played this scenario several times.  My first attempt was a full scale frontal assault on the village proper which ground to a halt eventually after my troops were exhausted.


The second attempt, I made a pinning attack on the left and tried to take the heights from the right flank.  I still didn't have enough reserves to pull this off.  Interestingly the small woods in the left center of the heights was the scene of the bloodiest fighting in every scenario.


Mark finally took the French and did a real Patton esque flanking movement with all the cavalry at his disposal and was able to penetrate the Austrian perimeter on the heights.

All in all the rules really had the feel of a Napoleonic battle.  Nothing broke quickly but got ground down and any assault needed fed with fresh troops to succeed.  The use of combined arms was key. Artillery needs to be engaged at the front to soften up areas for assaults.  We decided to use unit identification tags that included all you needed for calculating combat results.  This made the game really move quickly.  


Added a Guinness to give you an idea of scale.


Stay tuned for more as the French and Austrians continue their struggle.  Lots more stuff on the painting table.


Saturday, March 7, 2015

Napoleonic Naval : Battle of Cape Lagos August 18, 1759

Gathered at Mark's house for a rare Tuesday night battle.  This one was four player Napoleonic Naval featuring the Battle of Cape Lagos,  August 18, 1759 off the southwestern tip of Portugal.

In 1759 King Louis XV's ministers drew up plans to invade various parts of Great Britain.  As a result an army of 17,000 French soldiers was being assembled at Vannes, France to prepare to land in Ireland.  As this invasion force came together a variety of French squadrons sallied from there ports to coordinate with the invasion.

The French Navy Toulon Squadron under Admiral Jean-Francois de La Clue-Sabran sailed toward Vannes with the following ships.

Ocean (Flagship) 80 gun
Redoubtable       74 gun
Centaure             74 gun
Temeraire           74 gun
Modeste              64 gun
Souverain           74 gun
Guerrier              74 gun

As they passed Gibraltar they were immediately spotted and a British squadron put to sea to catch them.  Part of the formation broke up leaving the following to close on the French.

Royal Navy Gibraltor Squadron under Admiral Sir Edward Boscawen
Namur (Flagship) 90 gun
Culloden              74 gun
Warspite              74 gun
Intrepid                64 gun
America               60 gun
Portland               50 gun
Guernsey             50 gun

Initial setup with the British coming in from the left and the French line running down the right side of the photo.  The coast is just out of sight on the left.  The French are positioning to fight or move around the coast as they can also win the scenario by evading the British Fleet and getting away.


Carronades commence in the center of the formation while half of the French make a dash for the coast.  The result, the French Ocean, Redoubtable and Centaure being struck and taken under tow.  The British Namur and Intrepid were dismasted and punished Hull.  The remaining French were able to withdraw in good order and only lightly damaged if at all.


   The air is filled with French iron.


Around turn five or six the wind made an unexpected 120 degree shift.  This stopped the French dead in their tracts and allowed the British freedom to maneuver at will.  The French ambitions were effectively stalled at this point.  Merde!

ZOMBIES!!! Friday night fight ..or flight ..or fright

Played a great round of Twilight Creations "Zombies!!!" for our Friday night fight.  I love this game.  They have so many expansions it's ridiculous.  I'm trying to get motivated to paint the 28mm Scooby Doo Zombie Hunter figures I got from Hasslefree Miniatures.  Also picked up Columbus and Tallahassee from "Zombieland", and an Elvis impersonator with a .357 magnum and guitar.  Watch for future painting updates.


The Zombies all seemed to be drifting towards the Sporting Goods area of town.  
 

After killing about a dozen zombies each Matt was able to cut his way through to the Helipad and was whisked off to safety.  Leaving me to a horrible "Walking Dead" style death.


I really love that when we bought this game originally at ORIGINS we got to talk to Kerry Breitenstein of the design team, and the card artist Dave Aikins who did a quick magic marker sketch on the box lid.  That is so awesome.


 Coming soon ...... if we have the courage, playing


Order of Battle for Churubusco, August 20, 1847

I thought I post the OB for this scenario.  It has an awesome mix of troop types.  


The Mexican-American War
August 20, 1847 Churubusco, The Campaign on Mexico City


   As the American forces, led by General Winfield Scott, began the final offensive on Mexico City, the Mexican defenses collapsed at the battles of Contreras and San Antonio.  Remnants of the Army of the Center fell back to the village of Churubusco, just 5 miles from the capital.
   The Mexicans made their stand at the Franciscan convent of Santa María de Churubusco. Although the convent offered no advantage of height over the surrounding terrain it was positioned to protect a bridge over a small river that the U.S. forces had to negotiate to take the position. In addition to the stone walls of the convent, the defenses included a series of incomplete trenches the Mexicans had begun digging prior to the attack.
   Numbered among the Mexican defenders was the Saint Patrick's Battalion, known as the San Patricios.  The unit was made up of American deserters, mostly of Irish descent, who deserted in protest to their treatment in the U.S. Army.
   The approaching U.S. forces merged with pursuing forces coming from Contreras to assault the Mexican position which was now almost all that stood between them and the capital.

United States Forces under command of Maj. Gen. Winfield Scott:  (7,300 men)
     
Maj. Gen. Winfield Scott & Guard       

1st Division
Gen. William J. Worth & Guard       

  1st Brigade - Garland’s Brigade

   Lt. Col. Garland’s Staff               
   4th U.S. Infantry                      
   2nd Arty. Regt. Infantry                
   3rd Arty. Regt. Infantry                

  2nd Brigade - Clarke’s Brigade
   5th U.S. Infantry                       
   6th U.S. Infantry                      
   8th U.S. Infantry                       
   Battery A, 2nd U.S. Arty/8# guns       


2nd Division
Col. David E. Twiggs & Guard


  1st Brigade - Smith's Brigade
   3rd U.S. Infantry 
   1st Arty Regt. Infantry 
   U.S. Regt of Mtd. Rifles 
 

  2nd Brigade - Riley's Brigade
   7th U.S. Infantry 
   2nd U.S. Infantry
   4th Arty. Regt. Infantry 
   Battery K, 1st U.S. Arty/6# guns
 

  3rd Bigade - Shield’s Brigade
   Lt. Col. Shield’s Staff
   2nd New York Volunteers 
   1st South Carolina Volunteers 
   U.S. Marine Detachment
   Field Batt, 1st U.S. Arty/6# guns

3rd Division
Maj. Gen Gideon Pillow & Guard
 

  1st Brigade - Pierce's Brigade
   Lt. Col. Pierce's Staff
   9th U.S. Infantry 
   12h U.S. Infantry 
   15th U.S. Infantry 
 

  2nd Brigade - Cadwalader’s Brigade
   11th U.S. Infantry 
   14th U.S. Infantry 
   U.S. Voltiguers  
   Battery I, 1st U.S. Arty/6# guns


Mexican Army under command of Gen. Antonio Lopez de Santa Anna:  (3,904 men)

Gen. Santa Anna & Guard
  Hussars of the Supreme Power 
  Light Mntd. Regt. of Veracruz 
  Tulancingo Cuirassier 

  Cavalry of the Army of the North Jauregui
  Gen. Jauregui & Guard
   2nd Cavalry  
   3rd Cavalry  
   7th Cavalry  
   8th Cavalry  
   Active Militia Cav of Guanajuato 
   A. M. Cav of San Luis Potosi 

  Light Brigade Perez
   Gen. Perez Staff
   1st Light Infantry
   3rd Light Infantry
   4th Light Infantry
   11th Line Infantry

  1st Division
   1st Brigade
    General Manuel Rincón & Guard
    National Guard of Acapulco
    National Guard of Lagos
   2nd Brigade
    Hidalgo National Guard Batt 
    Victoria National Guard Batt
    Mexican Arty/4# guns

  2nd Division Anaya
   1st Brigade
    Bravos National Guard Batt 
    Independencia Natil Guard Batt 
   2nd Brigade
    Natnl Guard Batt of Tlapa  
    San Patrico Cmd & Guard
    San Patrico Staff
    San Patrico active Militia 
    San Patrico Arty/4# guns

Saturday, February 28, 2015

Mexican American War - 18mm Eureka

I have to finish off a few stands of U.S. Sky Blues from a batch of 18mm MexAm war figs a got from Eureka miniatures a few years ago.  These figs are too nice not to show up on the battlefield. Two of the poses in this pic are some of the best I've ever seen.  The mounted officer I got was also one of the nicest sculpts I've ever seen but he was too big to fit in with the army I have, which is made up of Friekorps and Musket figs.  I painted this army long before the Old Glory line came out and I only have some of their Mexican line cavalry in it.


 Here are some pics of the army and a scenario we played at Mark Ritchie's last summer for the Battle of Churubusco.  This really makes me want to get these guys out again.


The Mexican-American War
August 20, 1847 Churubusco, The Campaign on Mexico City
 

   As the American forces, led by General Winfield Scott, began the final offensive on Mexico City, the Mexican defenses collapsed at the battles of Contreras and San Antonio.  Remnants of the Army of the Center fell back to the village of Churubusco, just 5 miles from the capital.
   The Mexicans made their stand at the Franciscan convent of Santa María de Churubusco. Although the convent offered no advantage of height over the surrounding terrain it was positioned to protect a bridge over a small river that the U.S. forces had to negotiate to take the position. In addition to the stone walls of the convent, the defenses included a series of incomplete trenches the Mexicans had begun digging prior to the attack.
   Numbered among the Mexican defenders was the Saint Patrick's Battalion, known as the San Patricios.  The unit was made up of American deserters, mostly of Irish descent, who deserted in protest to their treatment in the U.S. Army.
   The approaching U.S. forces merged with pursuing forces coming from Contreras to assault the Mexican position which was now almost all that stood between them and the capital.